Modifying or Canceling an Invoice
Updated 04/09/2015
Printable Version |
Oracle R12 - Quick Reference Guide |
Invoices > Entry > Invoices
Invoice Workbench
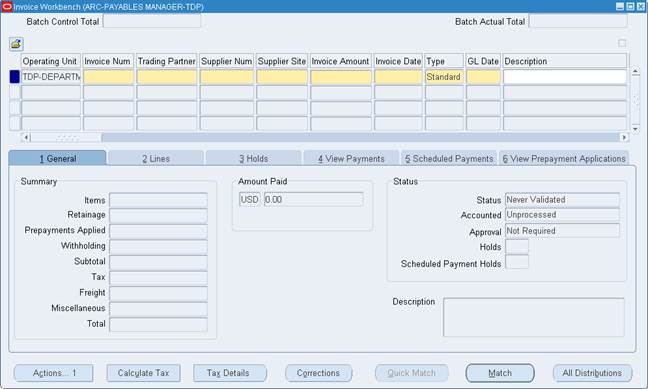
Perform the following step to query an invoice:
| Step | Field | Action |
|---|---|---|
| 1. | Click the |
|
| 2. | Enter the Invoice Number in the Invoice Num field. | |
| 3. | Click the |
Once an invoice has been validated the fields that can be updated are limited to:
- Description – You may add or alter the description on the Invoice Header.
- Descriptive Flexfields – Guarantee agreement number can be changed, if the wrong agreement number has been entered.
- Invoice Amount – Can be updated to zero, only if the invoice is unpaid and cannot be cancelled because it’s been matched to a finally closed PO. Non-referencing distribution lines must be entered to reverse the distribution lines matched to the PO so the distribution total equals zero. The invoice will need to be revalidated after the changes.
- Remit to Bank Information – If you change the banking information after the invoice has been approved, you will need to update the remit to bank information. Click on the Scheduled Payment tab and then click on the Remit To Bank field. The new Bank Account will automatically update. For additional information on updating the bank accounts, please go to the Payment Request FAQ (See Topics 4 and 5).
- Global Descriptive Flexfield (GDF) – If the BETC, Trading Partner TAS or Trading Partner BETC need updated, modification must be done at the Distribution Level. Click into the Lines Tab then the ‘Distributions’ button, then change the GDF values as needed and save.
Notes:
*Invoice lines that are matched to a purchase order should never be deleted. If the decision is made that the line is not needed the user can click the Discard Line button. The deletion of a matched line will cause the Purchasing module and the Accounts Payable module to be out of sync with each other.
**You may not modify other fields on the invoice. If you need to correct the information in those fields, you have two options:
1. Paid Invoices – On invoices that have been paid, you will need to create a Zero Dollar Correction document to fix the accounting string information, the GDF or Project (POET information). Click on the link above to go to the Entering Zero Dollar Invoices QRG.
2. Unpaid Invoices – On invoices that have not yet been paid you may cancel the invoice.
Cancelling an Invoice
Instructions for cancelling an IPP invoice
Instructions for cancelling a non-IPP invoice
To cancel an IPP invoice, perform the following steps:
| Step Number | Field Name | Description | Action |
|---|---|---|---|
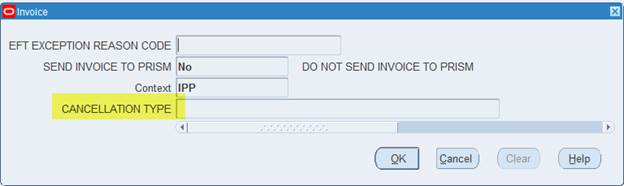
| 1 | Invoice Header Descriptive Flexfield (DFF) | DFF in invoice header: |
Click into DFF to open it |
| 2 | DFF Cancellation Type | IPP Invoice cancellation type | Click on list of values to select appropriate cancellation type. |
| Step Number | Field Name | Description | Action |
|---|---|---|---|
| 3 | Save icon | Saves changes | Click on the Save Icon. This is the yellow disk located in the application toolbar. |
| 4 | Actions… 1 | Actions… 1 | Click on the Actions…1 button to go to the Invoice Actions window. |
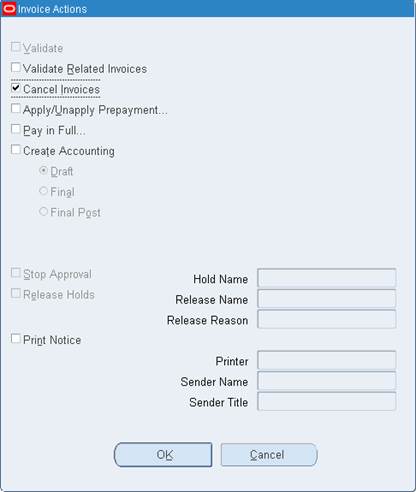
Invoice Actions Window

Perform the following steps on the Invoice Actions window:
| Steps | Action |
|---|---|
| 1 | Click the Cancel Invoices checkbox |
| 2 | Click the OK button. |
Caution Message
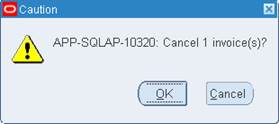
| Steps | Action |
|---|---|
| 1 | Click the OK button on the Caution Message window. |
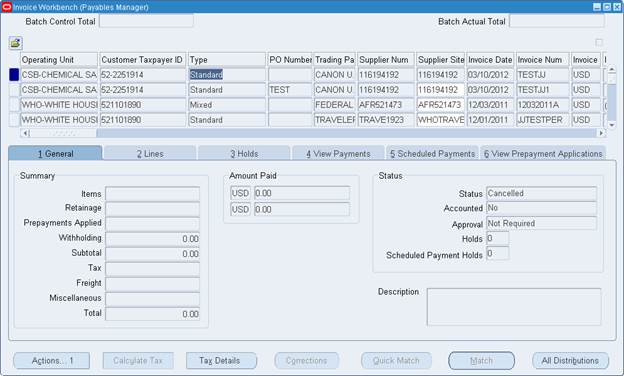
Invoices Workbench – Cancelled Invoice

Perform the following steps to confirm cancellation of invoice:
| Steps | Action |
|---|---|
| 1 | Verify that the status of the invoice has changed to Cancelled. |
| 2 | Exit the Invoice form by clicking on the X in the active window. |
To cancel a non-IPP invoice, perform the following steps:
| Step Number | Field Name | Description | Action |
|---|---|---|---|
| 1 | Actions… 1 | Actions… 1 | Click on the Actions…1 button to go to the Invoice Actions window. |
Invoice Actions Window
Perform the following steps on the Invoice Actions window:
| Steps | Action |
|---|---|
| 1 | Click the Cancel Invoices checkbox |
| 2 | Click the OK button. |
Caution Message

| Steps | Action |
|---|---|
| 1 | Click the OK button on the Caution Message window. |
Invoices Workbench – Cancelled Invoice
Perform the following steps to confirm cancellation of invoice:
| Steps | Action |
|---|---|
| 1 | Verify that the status of the invoice has changed to Cancelled. |
| 2 | Exit the Invoice form by clicking on the X in the active window. |